Wooden shoe racks collect more than shoes. They hold dust, damp footprints, road salt, skin oils, and yesterday’s mud. Knowing How to clean wooden shoe racks helps protect the finish while keeping entryways fresher. The safest method is gentle, controlled, and suited to the wood’s surface.
Melissa Maker, a residential cleaning expert and founder of Clean My Space, advises, “Cleaning is not about achieving perfection; it’s about creating a healthier, happier home.” That practical idea fits wooden furniture well. A clean rack should look cared for, not soaked or aggressively scrubbed. Before cleaning, remove every shoe and inspect the rack for loose joints, scratches, or cloudy areas. Small details matter.
Use a soft brush or vacuum attachment to lift grit from corners and slats. Then dampen a microfiber cloth with warm water and wring it almost dry. Add a small amount of mild dish soap only when greasy marks remain. Wipe with the grain, not against it. Dry each section immediately with a clean towel. Water left around joints can cause swelling, peeling, or unpleasant odors.
I have found that patience prevents most damage. Still, one method may fail on a heavily waxed or unfinished rack. Test any cleaner underneath first. Avoid bleach, abrasive powders, soaking, and rough sponges. The finish may appear strong, but it can be surprisingly delicate. This guide explains practical cleaning steps, safer product choices, stain handling, and simple habits that reduce future buildup.
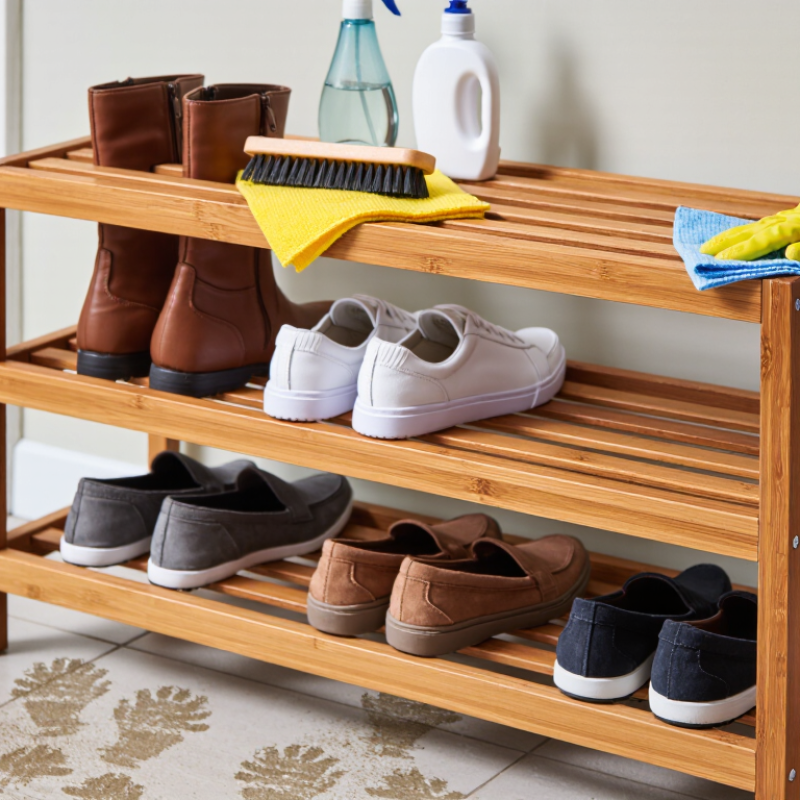
Before cleaning a wooden shoe rack, inspect its surface, joints, and underside. Look for peeling finish, swollen edges, loose screws, or dark moisture marks. Check the underside. These signs reveal whether the rack can tolerate damp cleaning. Solid wood usually handles careful wiping better than thin veneer or particleboard. However, wood types and finishes vary, so avoid assuming every rack needs the same treatment.
I once used too much water on a rack near a doorway. The surface looked clean, but one corner warped later. That mistake changed my routine. Test the cleaning solution on a hidden area first. Mix a small amount of mild soap with warm water, then dampen a soft cloth. The cloth should feel nearly dry. Less water is safer. Wipe along the wood grain, not against it. Use a soft brush around joints where dust and grit collect.
For dusty racks, a dry microfiber cloth may be enough. For sticky marks, repeat gentle wiping instead of scrubbing hard. Dry each section immediately with a clean towel. Never soak the shelves or let water stand near screw holes. If the finish feels cracked, waxy, or uncertain, choose dry cleaning and seek advice from a furniture-care professional. I still recheck corners after cleaning, because a rack can appear dry while moisture remains underneath.
Assess the wooden shoe rack first: identify whether it has a sealed, painted, or unfinished surface. For most finished wood, use the least-moist method that removes the dirt. The chart compares the approximate pH of common cleaning options.
Dry microfiber cleaning is the safest first step. If more cleaning is needed, use a lightly damp cloth with clean water or a small amount of diluted mild soap, then dry the rack immediately. Avoid soaking unfinished wood, and avoid vinegar or bleach because acidic or highly alkaline solutions may damage finishes and discolor wood.
Before cleaning a wooden shoe rack, clear a stable area near an open window. Remove shoes, baskets, and loose dirt from every shelf. I use a vacuum with a soft-brush attachment, two microfiber cloths, a soft toothbrush, mild pH-neutral soap, and a dry towel. Keep the bucket small and clearly labeled. Less water wins.
The U.S. Environmental Protection Agency reports that indoor pollutant levels can be two to five times higher than outdoor levels. Ventilation therefore matters, especially when dust and shoe debris have collected for months. Place the rack on a washable mat, not directly on damp flooring. Wear household gloves if dust irritates your skin, and keep electrical tools away from spilled water. NWFA wood-care guidance commonly recommends indoor humidity between 30% and 50%, which helps reduce excessive shrinking or swelling. A simple hygrometer can check the room before cleaning.
Start with dry removal. Scrub corners gently with the toothbrush, then wipe from the top shelf downward. Mix only a small amount of soap into lukewarm water. The cloth should feel barely damp, never wet. I once used too much water and left a pale edge on unfinished wood. That mistake still informs my routine. Test a hidden spot, wait several minutes, and inspect the finish before cleaning visible surfaces. Dry each section immediately, and leave the rack empty until the wood feels completely dry.
Cleaning a wooden shoe rack safely starts with reaching every surface, not just the visible shelves. I remove the shoes and shake out loose grit outdoors. A soft vacuum brush lifts dust from slats, corners, joints, and the underside. A dry microfiber cloth then catches the fine powder left behind. Do not forget the back panel and feet. Dirt often hides there.
For stuck marks, I lightly dampen a clean cloth with warm water and a small amount of mild soap. The cloth should feel barely moist, never wet. I wipe along the wood grain, then dry each area immediately. Cotton swabs help clean narrow grooves and screw holes. Before using any solution, test it on a hidden spot. Some finishes react badly, even when the cleaner seems gentle.
I used to scrub dark edges too hard. That removed grime, but it also dulled the finish. A slower pass works better. If muddy shoes have left grit, lift the particles first instead of rubbing them across the surface. Avoid soaking joints, unfinished wood, and the rack’s bottom edges. Let the rack air-dry with good ventilation, and inspect it under bright light for missed dust. Look closely. Small corners matter.
How to Clean Wooden Shoe Racks Easily and Safely?
Clean Stains and Disinfect the Wood Without Causing Damage
Start by removing every shoe and loose particle. Use a soft brush or vacuum attachment around corners and joints. Mix warm water with a few drops of mild dish soap. Dip in a microfiber cloth, then wring it almost dry. Wipe one small section at a time. For muddy marks, hold the damp cloth over the stain briefly. Do not scrub aggressively. That can spread dirt and remove the finish.
Disinfection needs more care. Clean the surface before disinfecting it. Otherwise, grime can reduce the disinfectant’s effectiveness. Choose a product clearly labeled for sealed wooden surfaces, and follow its contact time. Never soak the rack. Avoid bleach, abrasive powders, steam, and strong solvents. They may whiten, swell, or dull the wood. Test the product inside a hidden corner first. Keep windows open while the surface dries.
One lesson is easy to miss: “clean” does not always mean “wet.” Excess moisture can enter screw holes and create swelling later. After wiping, dry the rack with a clean towel and leave space around it. Check the finish the next day. A faint cloudy patch means the cleaner was too strong or the cloth was too wet. I would then stop, avoid polishing immediately, and seek advice from a furniture-care professional. Wooden surfaces vary, so a method that works on sealed oak may harm unfinished wood.
A wooden shoe rack needs gentle cleaning, not soaking. I wipe dust away with a soft, dry cloth before using any cleaner. This prevents grit from scratching the surface. For sticky marks, I dampen a cloth with lukewarm water and mild soap. The cloth should feel barely wet. Excess moisture can enter joints, soften unfinished wood, or leave cloudy patches.
Dry the rack immediately with a clean towel. I also leave its doors or shelves open for several minutes. Good airflow removes hidden moisture around corners and screw holes. Never place wet shoes directly on wooden shelves. Let muddy footwear dry first, then brush off loose dirt outside. A shallow tray can catch drips, but it should not hold standing water. Check the tray often.
Protection depends on the rack’s finish. A small amount of suitable wood conditioner may help finished wood resist dryness and dullness. Test it on an unseen area first. Avoid mixing cleaning products or applying oily sprays near dusty surfaces. Once, I used too much conditioner and created a slippery film that attracted dirt. That mistake reminded me to use less and buff carefully. Inspect the rack monthly for swelling, loose joints, mildew odors, or peeling finish. Tighten loose hardware gently, and keep the rack away from radiators, direct sunlight, and damp walls. Temperature changes can cause wood to warp slowly.
| Cleaning or Maintenance Stage | Recommended Materials | Safe Method | Recommended Frequency | Important Precautions |
|---|---|---|---|---|
| Remove shoes and loose dirt | Soft brush, dry microfiber cloth, or vacuum with a brush attachment | Take all shoes off the rack. Brush or vacuum dust, grit, hair, and debris from shelves, corners, and joints. | Weekly or whenever visible dust accumulates | Do not scrape the wood with sharp tools, as scratches can expose unfinished areas. |
| Prepare a mild cleaning solution | Lukewarm water, a small amount of mild dish soap, and two clean cloths | Mix approximately 1 teaspoon of mild soap with 1 quart, or about 1 liter, of water. The solution should be lightly soapy, not concentrated. | Before each damp-cleaning session | Avoid soaking the wood. Excess water can cause swelling, staining, or finish damage. |
| Wipe the wooden surfaces | Wringed microfiber cloth | Dampen the cloth in the solution and wring it until nearly dry. Wipe in the direction of the wood grain, working from the top shelf downward. | Every 1–3 months, or after mud and spills | Test the solution on a hidden area first, especially on stained, painted, veneered, or unfinished wood. |
| Clean corners, joints, and grooves | Soft toothbrush or small soft-bristled brush | Use a barely damp brush to loosen dirt from joints and narrow gaps. Follow with a dry cloth. | During each detailed cleaning | Use light pressure to avoid removing paint, stain, or protective coating. |
| Remove sticky residue | Soft cloth and diluted mild soap solution | Hold a warm, damp cloth over the residue briefly, then wipe gently. Repeat rather than rubbing aggressively. | As needed | Do not use metal scrapers, abrasive powders, or rough scouring pads. |
| Dry the rack completely | Clean dry towel and good air circulation | Immediately wipe away moisture. Leave the rack empty in a shaded, well-ventilated area until fully dry. | After every damp cleaning or spill | Keep it away from radiators, heaters, and prolonged direct sunlight, which may dry or warp the wood unevenly. |
| Protect the finish | Wood conditioner or polish suitable for the rack’s existing finish | Apply a small amount to a cloth, not directly to the wood. Buff lightly and remove excess product. | Every 3–6 months, if recommended for the finish | Do not apply oil, wax, or polish to unfinished wood unless the manufacturer’s care instructions allow it. |
| Control moisture and odor | Ventilation, washable shelf liners, and dry shoes | Allow shoes to dry before storage, avoid blocking airflow, and clean or replace shelf liners when soiled. | Daily habits; inspect monthly | Do not seal damp shoes or wet mats inside the rack, as trapped moisture can encourage mold growth. |
| Inspect and maintain hardware | Dry cloth and suitable screwdriver | Check screws, joints, shelves, and feet. Tighten loose hardware carefully and replace damaged parts when necessary. | Every 3–6 months or after moving the rack | Do not overtighten screws, because excessive force can strip wood or damage threaded fittings. |
Safety note: Always follow the care instructions supplied with the shoe rack and keep cleaning products away from children and pets.
Use a soft vacuum brush, microfiber cloths, a soft toothbrush, mild soap, and a dry towel. Keep water limited.
Open a window and place the rack on a washable mat. Keep electrical tools away from spilled water.
Remove all shoes and shake out loose grit outdoors. Vacuum shelves, slats, corners, joints, feet, and the back panel.
Mix a few soap drops with lukewarm water. Wring the cloth until it feels barely damp.
Lift loose grit before wiping. Hold a damp cloth over the mark briefly, then wipe along the wood grain.
Yes. Test a hidden corner and wait several minutes. Some finishes react badly to gentle cleaners.
Clean the surface first, then use a product labeled for sealed wood. Follow its contact time and avoid soaking the rack.
Avoid bleach, abrasive powders, steam, strong solvents, and excessive water. They can swell, whiten, or dull the wood.
Dry each section immediately with a clean towel. Leave the rack empty until the wood feels completely dry.
Stop using the cleaner and avoid immediate polishing. The cloth may have been too wet, or the solution too strong.
How to clean wooden shoe racks safely begins with assessing the rack’s finish, material, and condition. Check for peeling paint, cracks, loose joints, or delicate coatings before choosing a cleaning method. Prepare a well-ventilated area and gather soft cloths, a gentle brush, mild soap, clean water, and a dry towel. Remove all shoes and accessories, then dust every shelf, corner, and support to prevent dirt from spreading during wet cleaning.
For stubborn stains, use a lightly dampened cloth with diluted mild soap and test it on a hidden area first. Avoid soaking the wood, harsh chemicals, and abrasive tools that may damage the surface. Wipe away soap residue with a clean, damp cloth, and disinfect carefully with a wood-safe solution when appropriate. Dry the rack thoroughly with a towel and allow air circulation before replacing the shoes. Regular dusting, prompt stain removal, and occasional protective treatment can help maintain its appearance, strength, and cleanliness.

URneat Furnish